「イマサラ」だからこそ始めるTwitter Bot作成 ~ 開発環境を作ろう(後編) ~
【Intro】
前回はCentOSをインストールして簡単な設定を行いました。しかし、肝心のWebサーバやPHPなどのインストールはしていませんね。正直なところ、前編で行ったCentOSのインストール中に一緒に入れてしまうこともできたのですが、そんなのを書いても面白くないですよね? (Y/y)
というわけで、今回はPHPなWebアプリケーションを作れる環境を整えるために、ソースファイルから導入していきたいと思います。ApacheとPHPはもちろん、関連で使用するOpenSSLとcURLのインストール方法をステップ・バイ・ステップでご紹介したいと思っております。
【1st Step:OpenSSLをインストールしよう!】
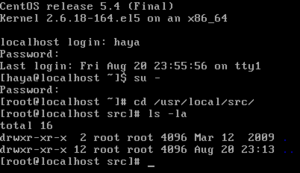
さて、それでは早速はじめましょう。まずは前回までに構築した開発環境を起動し、コンソール(開発環境サーバにつながっているモニタやらキーボードやら)より一般ユーザーでログインします。rootにsuした後、「/usr/local/src」に移動します。
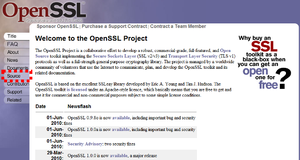
OpenSSLのソース(というかTarball)を入手するために、Webブラウザを起動し、こちらにアクセスします。ページが表示されたら、左端にあるメニューより「Source」をクリックします。
ダウンロード可能なTarballの一覧が表示されるので、最新版のソースをダウンロードしましょう。「[LATEST]」と書いてある行のリンクが最新の安定版です。ファイル名のテキストリンクをクリックするとダウンロードできます。
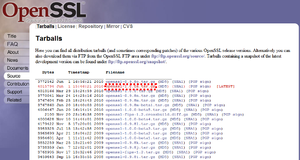
ダウンロードできたら、それをSCPなりSFTPなりでサーバにアップし……たいところですが、サーバ自体がDHCPで動作するように作っているので、IPアドレスが分からないとSCP/SFTPで接続することができませんね。……考えるのが面倒なので、サーバ上で直接ダウンロードしてしまいましょう。先のダウンロードページで「ファイル名のテキストリンクをクリック」するのではなく、「ファイル名のテキストリンクをポイントした状態で右クリックし、コンテキストメニューより【リンクアドレスをコピー】」しましょう。
今現在、あなたは開発環境にログインし、rootな状態で「/usr/local/src」にいるはずです。そのコンソール(あるいはSSHクライアント)上で、「wget 'http://www.openssl.org/source/openssl-{VERSION}.tar.gz'」とタイプし、エンターキーをどや顔で押しましょう。あ、「{VERSION}」のところはバージョン番号が入ります。ちなみにこの記事を書いている時点での最新版は、「openssl-1.0.0a.tar.gz」でした。あなたが不幸にもこの記事を参照しつつ構築をしている場合、より新しいバージョンがリリースされているかもしれません。各自読み替えてください。
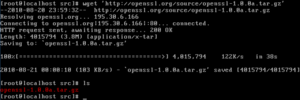
無事にダウンロードできたら、Tarballを展開しましょう(本当はsha1なチェックサムなどで、ダウンロードしたファイルのチェックをした方がよいのですが割愛)。「tar xzf ./openssl-{VERSION}.tar.gz」とタイプすると展開できます。「openssl-{VERSION}」というディレクトリができているはずですから、確認してみてください。

それではコンパイルを行いましょう。「cd ./openssl-{VERSION}」でカレントディレクトリを移動した後、「./config --prefix=/usr/local --openssldir=/usr/local/openssl threads zlib-dynamic shared」とタイプしましょう。……あ、「config」のオプションは目的に合うように各自好きなものを設定してくださいね。
ずらずらと英語や日本語や記号が入り交じった魔法の呪文が画面上を流れていくので、それをコーヒーでも飲みながら優雅に眺めましょう。「Configured for ~」というメッセージが表示されれば準備完了です。続いてコンパイルを行いましょう。「make」とタイプします。
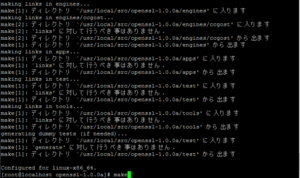
ずらずらと英語や日本語や記号が入り交じった魔法の呪文が画面上を流れていくので、それをミルクティーでも飲みながら優雅に眺めましょう。特に「エラー」とか「Error」とか「Fail」とか、その手のブルーなメッセージが表示されてない状態で、コマンドプロンプトに戻ってきていればOKです。続いてインストールを行いましょう。「make install」とタイプします。
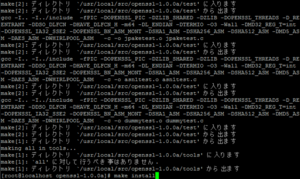
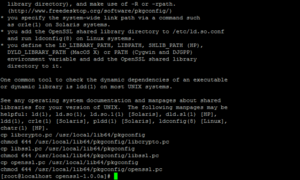
ずらずらと英語や日本語や記号が入り交じった(中略)、それを緑茶でも飲みながら優雅に眺めます。例によって、「エラー」とか「Error」とか「Fail」とか、その手のブルーなメッセージが表示されてない状態で、コマンドプロンプトに戻ってきていればOKです。これでOpenSSLのインストールが完了しました! やったね♪
【2nd Step:cURLをインストールしよう!】
続いてcURLのソース(というかTarball)を入手するために、Webブラウザでこちらにアクセスします。ページが表示されたら、左端にあるメニューより「Download」をクリックします。
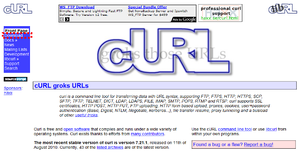
「Source Archives」のところに、ダウンロード可能なファイルの一覧があるはずです。今回は「.tar.gz」なTarballをGetしましょう。OpenSSLの時と同様に、ファイル名のテキストリンクをクリックしてダウンロードしてからSCP/SFTPで転送してもいいですし、「wget」コマンドで直接ダウンロードしても構いません。
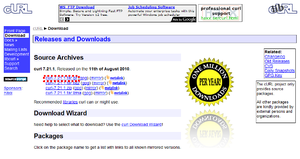
どちらの方法でも構わないので、「/usr/local/src」にTarballをダウンロードし、「tar」コマンドで展開します。わたしは「wget」コマンドでダウンロードしました。URLは「http://curl.haxx.se/download/curl-{VERSION}.tar.gz」といった感じになるようです。
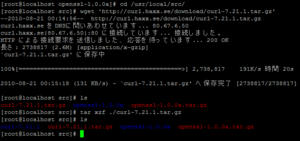
展開したらディレクトリを移動します。ここまではOpenSSLの時とほとんど同じ手順ですね。続いて「configure」を実行しましょう。configureオプションは目的に合うように各自好きなものを設定してください。ちなみにわたしは、「./configure --prefix=/usr/local/curl --disable-debug --enable-optimize --enable-warnings --enable-werror --disable-curldebug --disable-dependency-tracking --enable-http --enable-libgcc --enable-ipv6 --enable-nonblocking --enable-threaded-resolver --enable-verbose --enable-cookies --with-ssl=/usr/local/openssl」と指定してみました。
「configure」が終了したら、続いて「make」を実行しましょう。
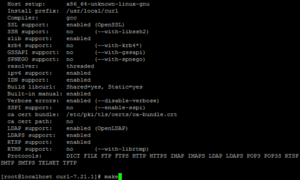
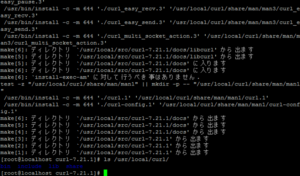
最後に「make install」を実行します。
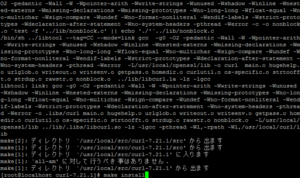
これでcURLのインストールが無事完了しました。やったね☆
【3rd Step:Apacheをインストールしよう!】
続いてApacheをインストールしましょう。Webブラウザでこちらにアクセスし、左側にあるメニューより、「from a mirror」のテキストリンクをクリックします。
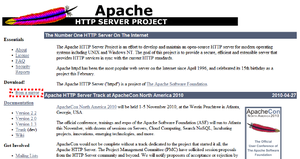
ダウンロード可能なバージョン一覧が表示されるので、最新の安定版(この記事を書いた時点では「2.2.16」)のテキストリンクをクリックします。
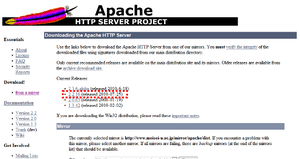
「.tar.gz」形式のテキストリンク(「httpd-{VERSION}.tar.gz」)をクリックします。「wget」コマンドでやりたい人は、「http://ftp.riken.jp/net/apache//httpd/httpd-{VERSION}.tar.gz」といったURLでダウンロードできます。いくつかミラーがあるので、「ftp.riken.jp」以外のサイトからダウンロードする可能性もあります。もちろん、あなたが好きなミラーサイトからダウンロードすることもできます。たまたま私は「ftp.riken.jp」だった……というだけです。念のため。
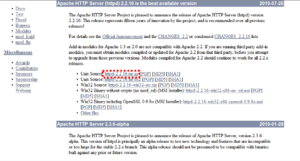
「/usr/local/src」にダウンロードしたTarballを配置し、展開します。
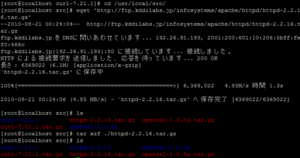
無事展開できたら、「cd httpd-{VERSION}」でカレントディレクトリを移動した後、「configure」を実行します。ちなみにわたしは、「./configure --prefix=/usr/local/apache2 --with-included-apr --enable-v4-mapped --enable-exception-hook --enable-pie --enable-modules=all --enable-mods-shared=all --enable-authn-dbm --enable-authn-anon --enable-authn-dbd --enable-authn-alias --enable-authz-dbm --enable-authz-owner --enable-auth-digest --enable-isapi --enable-file-cache --enable-cache --enable-disk-cache --enable-mem-cache --enable-dbd --enable-dumpio --enable-deflate --enable-log-forensic --enable-logio --enable-mime-magic --enable-cern-meta --enable-expires --enable-headers --enable-usertrack --enable-unique-id --enable-version --enable-http --enable-info --enable-cgi --enable-cgid --enable-vhost-alias --enable-imagemap --enable-speling --enable-rewrite --enable-so --with-mpm=prefork」というオプションでやってみました。

続いて「make」を実行します。
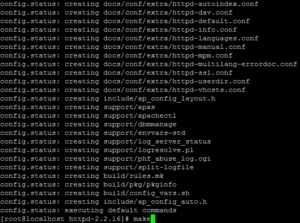
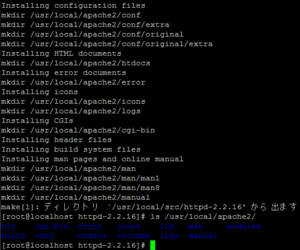
最後に「make install」を実行します。
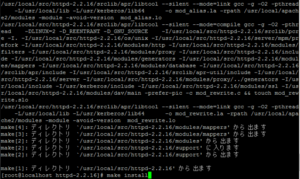
無事にインストールまで終わりましたか? お疲れ様でした。あともう少しですから、頑張りましょう!
【4th Step:PHPをインストールしよう!】
最後に、PHPをインストールしましょう。Webブラウザでこちらにアクセスし、ページ上部にあるメニューより、「downloads」のテキストリンクをクリックします。
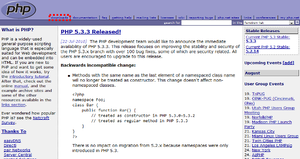
最新の安定版リリース(「.tar.gz」形式の方)のテキストリンクをクリックします。
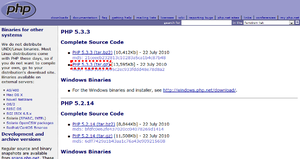
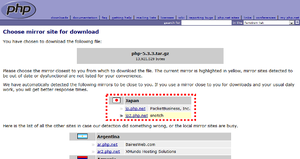
「jp.php.net」か「jp2.php.net」のどちらか一方のテキストリンクをクリックします。どっちを選んでも結果は一緒ですから、お好みでどうぞ。URLは「http://jp.php.net/get/php-{VERSION}.tar.gz/from/this/mirror」か「http://jp.php.net/get/php-{VERSION}.tar.gz/from/jp2.php.net/mirror」のどちらかになるはずです。
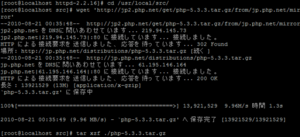
もういちいち説明しなくてもお分かりかもしれませんが、「/usr/local/src」にダウンロードしたTarballを配置し、展開します。
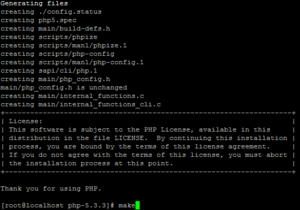
展開した結果作成されたディレクトリに移動します。みんなお待ちかねの「configure」を実行するだけの簡単なお仕事です。ちなみにわたしは「./configure --prefix=/usr/local/php5 --with-apxs2=/usr/local/apache2/bin/apxs --with-config-file-path=/usr/local/apache2/conf --enable-safe-mode --with-exec-dir=/usr/local/php5/safe_bin --enable-sigchild --enable-magic-quotes --disable-short-tags --enable-libgcc --with-libxml-dir --with-openssl --with-zlib --with-bz2 --with-libxml-dir --with-zlib-dir --enable-mbstring --with-libmbfl --with-zlib-dir --enable-shmop --enable-soap --enable-sockets --with-regex=php --enable-sysvmsg --enable-sysvsem --enable-sysvshm --enable-wddx --with-xmlrpc --with-xsl --enable-zip --with-zlib-dir --with-pear=/usr/lib/php --with-zend-vm=CALL --disable-inline-optimization --enable-zend-multibyte --with-curl=/usr/local/curl --with-curlwrappers --with-tsrm-pthreads」でやりました。

続いて、「make」の実行ですね。
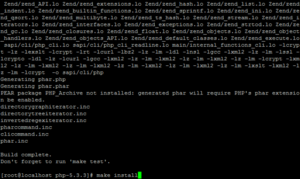
そして、「make install」を実行します。
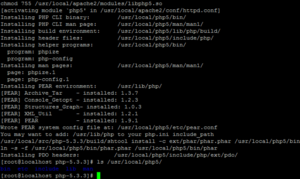
無事に終了したら、取りあえず必要なもののインストールは終わりました。あともうちょっとでBotの開発には入れますよ!
【5th Step:設定しよう!】
最後にPHPが使えるようにするための、最低限の設定をおこないましょう。本当に最低限なので、各自必要に応じて設定内容を確認してくださいね。
PHPのインストールが終わった直後ですので、今現在「/usr/local/src/php-{VERSION}」がカレントディレクトリですね。そのなかに、PHPの設定ファイルである「php.ini」のひながたがあります。「php.ini-development」と「php.ini-production」の2つがあるのですが、ファイル名を見ていただければ大体分かりますね。開発環境なので、「php.ini-development」を「/usr/local/apache2/conf」に「php.ini」というファイル名でコピーします。
コピーしたら、「/usr/local/apache2/conf」に移動し「php.ini」を編集します。わたしは「vi」コマンドを使いましたが、お好きな方法で編集してください。
mbstring関連の設定を行うのですが、ちょっと編集内容が多いので、変更前と変更後のコンフィグファイルを抜粋して下記に記載します。
<<<変更前>>>
[mbstring]
; language for internal character representation.
; http://php.net/mbstring.language
;mbstring.language = Japanese

; internal/script encoding.
; Some encoding cannot work as internal encoding.
; (e.g. SJIS, BIG5, ISO-2022-*)
; http://php.net/mbstring.internal-encoding
;mbstring.internal_encoding = EUC-JP

; http input encoding.
; http://php.net/mbstring.http-input
;mbstring.http_input = auto

; http output encoding. mb_output_handler must be
; registered as output buffer to function
; http://php.net/mbstring.http-output
;mbstring.http_output = SJIS

; enable automatic encoding translation according to
; mbstring.internal_encoding setting. Input chars are
; converted to internal encoding by setting this to On.
; Note: Do _not_ use automatic encoding translation for
;       portable libs/applications.
; http://php.net/mbstring.encoding-translation
;mbstring.encoding_translation = Off

; automatic encoding detection order.
; auto means
; http://php.net/mbstring.detect-order
;mbstring.detect_order = auto

; substitute_character used when character cannot be converted
; one from another
; http://php.net/mbstring.substitute-character
;mbstring.substitute_character = none;

; overload(replace) single byte functions by mbstring functions.
; mail(), ereg(), etc are overloaded by mb_send_mail(), mb_ereg(),
; etc. Possible values are 0,1,2,4 or combination of them.
; For example, 7 for overload everything.
; 0: No overload
; 1: Overload mail() function
; 2: Overload str*() functions
; 4: Overload ereg*() functions
; http://php.net/mbstring.func-overload
;mbstring.func_overload = 0

; enable strict encoding detection.
;mbstring.strict_detection = Off

; This directive specifies the regex pattern of content types for which mb_output_handler()
; is activated.
; Default: mbstring.http_output_conv_mimetype=^(text/|application/xhtml\+xml)
;mbstring.http_output_conv_mimetype=

; Allows to set script encoding. Only affects if PHP is compiled with --enable-zend-multibyte
; Default: ""
;mbstring.script_encoding=
<<<変更後>>>
[mbstring]
; language for internal character representation.
; http://php.net/mbstring.language
mbstring.language = Japanese

; internal/script encoding.
; Some encoding cannot work as internal encoding.
; (e.g. SJIS, BIG5, ISO-2022-*)
; http://php.net/mbstring.internal-encoding
mbstring.internal_encoding = UTF-8

; http input encoding.
; http://php.net/mbstring.http-input
mbstring.http_input = pass

; http output encoding. mb_output_handler must be
; registered as output buffer to function
; http://php.net/mbstring.http-output
mbstring.http_output = pass

; enable automatic encoding translation according to
; mbstring.internal_encoding setting. Input chars are
; converted to internal encoding by setting this to On.
; Note: Do _not_ use automatic encoding translation for
;       portable libs/applications.
; http://php.net/mbstring.encoding-translation
mbstring.encoding_translation = Off

; automatic encoding detection order.
; auto means
; http://php.net/mbstring.detect-order
mbstring.detect_order = "SJIS,EUC-JP,JIS,UTF-8,ASCII"

; substitute_character used when character cannot be converted
; one from another
; http://php.net/mbstring.substitute-character
mbstring.substitute_character = none;

; overload(replace) single byte functions by mbstring functions.
; mail(), ereg(), etc are overloaded by mb_send_mail(), mb_ereg(),
; etc. Possible values are 0,1,2,4 or combination of them.
; For example, 7 for overload everything.
; 0: No overload
; 1: Overload mail() function
; 2: Overload str*() functions
; 4: Overload ereg*() functions
; http://php.net/mbstring.func-overload
mbstring.func_overload = 0

; enable strict encoding detection.
mbstring.strict_detection = Off

; This directive specifies the regex pattern of content types for which mb_output_handler()
; is activated.
; Default: mbstring.http_output_conv_mimetype=^(text/|application/xhtml\+xml)
;mbstring.http_output_conv_mimetype=

; Allows to set script encoding. Only affects if PHP is compiled with --enable-zend-multibyte
; Default: ""
;mbstring.script_encoding=
編集が終わったら、忘れずに保存してください。続いて、Apacheの設定を行います。「php.ini」と同じ場所にある「httpd.conf」を「vi」コマンドなどで開きます。
開いたら、ファイルの一番最後の行に移動します。そこに下記の記述を追加します。この記述を追加することにより、「*.php」というファイル名でドキュメントルートに保存したものがPHPなプログラムとして実行されるようになります(これをしないと、PHPのソースがそのままブラウザ上に表示される)。いうまでもないですが、編集したらちゃんと保存してくださいね。
<IfModule mod_php5.c>
  AddType application/x-httpd-php .php .phtml .phtm .inc
  AddType application/x-httpd-php-source .phps
</IfModule>
これで設定ファイルの最小限な設定は終わりました。Apacheを起動させてみましょう。「/usr/local/apache2/bin」に移動します。今現在は「/usr/local/apache2/conf」にいるので、「cd ../bin」で移動できますね。
移動したら、「./apachectl -k start」とタイプしてください。これでApacheが起動します。起動したかどうかは「ps -ef | grep httpd」といったコマンドで確認すればいいかと思います。

続いてPHPの動作確認用ファイルをドキュメントルートに作成しましょう。デフォルトでは「/usr/local/apache2/htdocs」がドキュメントルートなので、そこに移動します。「cd ../htdocs」で移動できます。移動したら、適当な名前(「test.php」など)で、「<?php phpinfo(); ?>」とだけ書かれているファイルを作成します。

続いてWebブラウザより、たった今作成したファイルにアクセスしてみましょう。「test.php」という名前で作成したなら、「http://{IPADDR}/test.php」でアクセスできるはずです。「{IPADDR}」は開発サーバのIPアドレスです。各自環境に合わせて読み替えてください。
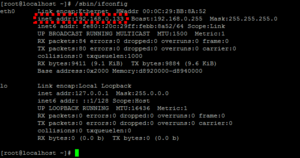
……ん? 「{IPADDR}は開発サーバのIPアドレスです。」って、この開発環境はDHCPでしたね。IPアドレスが何割り振られているか分かりませんね。今現在、コンソールより「/sbin/ifconfig」とタイプしてください。多分「eth0」の「inet addr」という項目が表示されていると思います。そこに表示されているアドレスが開発サーバのIPアドレスです。えっとこういう面倒なことがあるので、分かってる人はちゃんとDHCPではなく固定のIPアドレスをアサインしておくことをおすすめします。……これこそ「イマサラ」ですが。
さて、気を取り直してWebブラウザから「http://{IPADDR}/test.php」にアクセスしましょう。下記のような画面が表示されたら正常に設定できています。
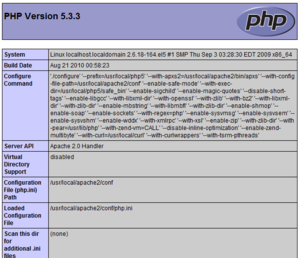
取りあえずきりのいいところまでできたので、ここで中断しましょう。「/usr/local/apache2/bin」に移動(「cd ../bin」で可)し、「./apachectl -k stop」とタイプしてApacheを終了させます。ちゃんと終了したかどうかは同じように「ps -ef | grep httpd」といったコマンドで確認すればいいかと思います。

【Outro】
今回でようやく開発環境の構築が終了しました。お疲れ様でした。こういったことをやりなれている方にはどうってことない話ですが、そうではない方にとってはかなり大変だったのではないでしょうか。この連載では、ただ「そっちの方が面白いから」という読者完全無視な理由で、「普通はこんなことやらねぇよ!」といった方法をご紹介してます。お仕事でやろうとしている方や、仮にプライベートであっても本格的にやろうとしている方は、お近くの詳しい人に聞くなり、本を買うなり、まともなWebサイトを見るなり、まともな人に代わりに構築してもらうなりしてください。
文字通り「読者完全無視」で突っ走ってますので、「ここが分からない」とか「○○にしたいんだけどどうするの?」(例:固定IPで運用したい / ソースからではなくRPMで入れたい)とかがあれば、コメントなりTwitterなりメールなりでご連絡ください。
余談ですが、「俺はBotが作りたいのであって開発環境とか時間かけて作ってる場合じゃねぇ!」とか「やってみたいけど手元に開発環境にできるコンピュータなんかない!」という方もいらっしゃるかと思います。そういう場合に備えているわけではないのですが、わたし個人が趣味で自宅サーバを運営しておりましてレンタルサーバのまねごともやってたりします。一応、複数で共用している都合上、完全な開発環境としては使えませんが、興味のある方は、「HYEC.ORG - レンタルサーバの利用をご希望の方へ」をご覧ください(非常にプアなサーバなので、過度な期待はしないでね!)。
次回はいよいよ本題のBot作成に取り組みましょう。……といっても、正直ネタがありません。メインテーマなはずなのですが、非常に簡単に終わると思います。はい。
当コラム「若人視点」へのご意見・ご感想・ご批判など、歓迎いたします。コメント欄に記入いただくか、el@hyec.orgあてにメールしてください。「@hyec」というアカウントでTwitterもやっていますので、もしよろしければフォローしてください。
いただいたメッセージはすべて拝見させていただきますが、個別にお返事させていただくことが難しいかもしれません。
なお、特に当コラムに対するご質問や誤字・脱字、認識の誤りについてのご指摘をいただいた場合は、個人を特定できないようにしたうえで、当コラム中で使用させていただくことがございます。